Be yourself; Everyone else is already taken.
— Oscar Wilde.
This is the first post on my new blog. I’m just getting this new blog going, so stay tuned for more. Subscribe below to get notified when I post new updates.
Be yourself; Everyone else is already taken.
— Oscar Wilde.
This is the first post on my new blog. I’m just getting this new blog going, so stay tuned for more. Subscribe below to get notified when I post new updates.
Design Brief:
The task is to create a structure with only 6 pieces of wood, each measuring 62×4.5×1.5 centimeters. We are to create any structure that can be used for entertainment or for everyday life. We can also shape borrow from other structures for ideas.
Design Requirement:
Make a Structure that has its own usage for entertainment/day to day life. To create something using only wood and other materials in consideration.
Limited use of only six (6) pieces of wood measuring 62×4.5×1.5 centimeters.
The artifact should have a purpose and not only intended for design
Must use at least three (3) joints to join different parts.
The artifact can be based on other structures given that it doesn’t copy the entire design.
Constraints
Grade
Considerations
Grade
Use of only 6 pieces of wood measuring 62×4.5×1.5 cm.
1
Portability
5
Use of at least 3 joints.
2
If the artifact is plain/varnished/colored
4
Artifact should have a purpose of its own.
4
How small the artifact can be.
3
Size of the artifact.
5
How the artifact is used.
1
The design must be loosely based on the structure of other buildings.
3
Other materials used to maximize the effectiveness of the artifact.
2
Top Five Priorities
Constraints Considerations
Use only 6 pieces of wood measuring 1. How the Artifact is used
62×4.5×1.5 cm. 2. Other Materials used
Use at least 3 joints 3. How small the Artifact is
The design must be loosely based on 4. If the Artifact is colored or varnished
other buildings 5. Portability
Artifact should have a purpose on its
own
Size of Artifact
Evaluation Criteria:
Did the Artifact only use the six planks of wood given?
Was the Artifact useful at anything?
Is the Artifact durable and has a long lifespan?
Did the Artifact use at least three (3) joints?
Did anyone get hurt?
Part
No.
Material
Length
Width
Thickness
Slope A
3
Wood planks
50 cm
4.5 cm
1.5 cm
Cup Dryer
1
Wood Planks
40 cm
4.5 cm.
1.5 cm
Case support
9
Wood Planks
10 cm.
3 cm
1.5 cm
Base Support
1
Wood Planks
31 cm.
4.5 cm
1.5 cm
Base Support 2
1
Wood Planks
20 cm
4.5 cm
1.5 cm
Tools and Equipment
Power tools
saw
drill
sandpaper
blade
Wood glue
varnish
Production Plan
Step
Procedure/Materials
Tools/Equipment
Risk
Time
1
Cutting the pieces according to their respective size with their own incisions
jigsaw, power saw, chisel, power planer
cuts
3 meetings
2
Creating the joints according to the piece
Power saw, jigsaw, power planer
cuts
2 meetings
3
Attaching the pieces together
Wood glue
Unnecessary excess glue
1 meeting
4
Varnishing and Finishing
Sandpaper and vanish
Cuts and eye contact
1 meeting
Progress Chart
Step
Week One
Week Two
Week Three
Week Four
Week Five
Week Six
Week Seven
Week Eight
Planning
Doing
Doing
Doing
Gathering of Materials
Doing
Doing
Doing
Cutting
Joint creation
Attaching pieces
reinforcing
7
8
Production Logbook
Day 1
Today Sir Oro held a lesson about Shape Borrowing and gave us some ideas and insights on what we should make with our 6 wooden planks.
Day 2
Today we just started on planning for our product. David and Kurt Brainstormed designs while Juan made the design brief and design requirements. We settled on a knife and shot glass holder. We are planning on finishing it early. We also started on our constraints and considerations.
Today was pretty easy. We also finished a little bit earlier than the other groups.
Day 3
Today we finished our design requirements up to the evaluation criteria and made improvements on the design. We decided to attach a lid with a hinge so that it would look better and it would be child proof
Day 4
Today sir Oro gave a comment on our design, he said that we should just make a utensil dryer instead of a knife and shot glass one so we just went with the flow. Kurt has also made our website and hopefully made a good one.
Day 5
Right now we just some finished of the other task while drawing the design of the utensil holder. We have already made up our mind on the design and it is what we are going to do
Day 6
This device is effective for small places for storage or when you have a small house.
In creating this product, we encountered some challenges but all of our groupmates contributed their own parts in order to finish within the time.
The materials were efficiently used and we have the appropriate equupment to ensure the best product that we can create.
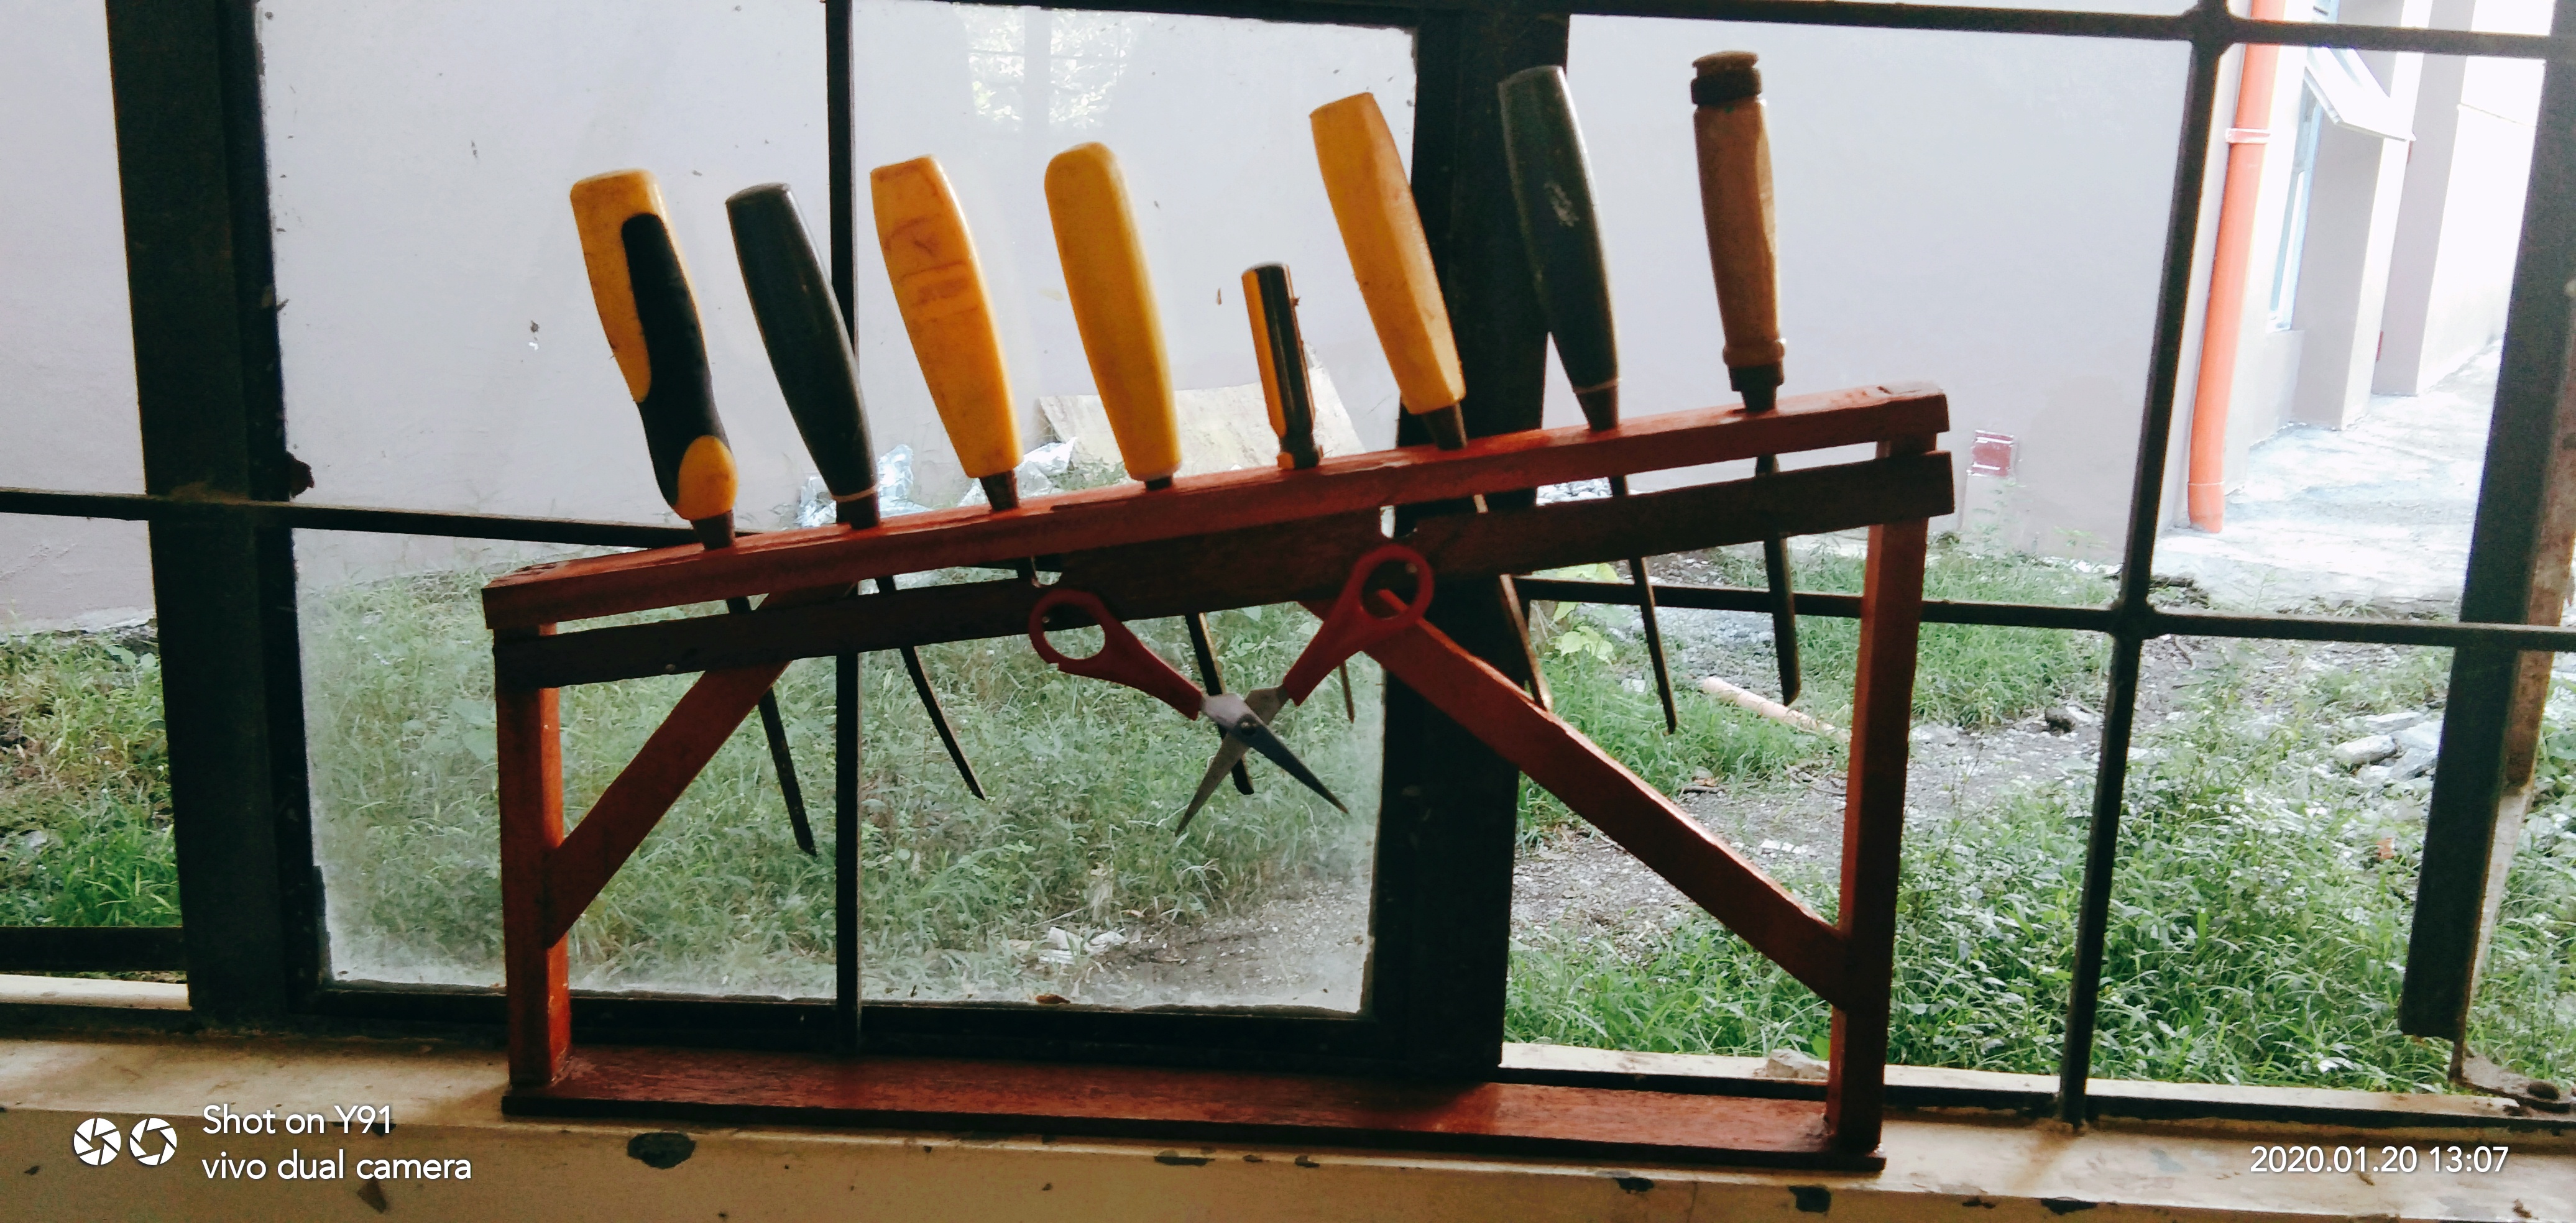
This is a space-saving, multi -purpose holder that can hold different kinds of materials. It can be placed on the table or beside a wall. Such items that it can store are pencils, pens, screw driver, knives, chisels, and other utensils and tools that we usually need in our basic lives. It can store materials through three ways. First is through the top holes, second is through the nails ,and third is through the side holes.
Progress Chart
| Step | Week One | Week Two | Week Three | Week Four | Week Five | Week Six | Week Seven | Week Eight |
| Planning | Doing | Doing | Doing | |||||
| Gathering of Materials | Doing | Doing | Doing | |||||
| Cutting | DON | DON | DON | DON | DON | |||
| Joint creation | DON | DON | ||||||
| Attaching pieces | DON | |||||||
| reinforcing | DON | |||||||
| 7 | ||||||||
| 8 |
Production Logbook
Day 1
Today Sir Oro held a lesson about Shape Borrowing and gave us some ideas and insights on what we should make with our 6 wooden planks.
Day 2
Today we just started on planning for our product. David and Kurt Brainstormed designs while Juan made the design brief and design requirements. We settled on a knife and shot glass holder. We are planning on finishing it early. We also started on our constraints and considerations.
Today was pretty easy. We also finished a little bit earlier than the other groups.
Day 3
Today we finished our design requirements up to the evaluation criteria and made improvements on the design. We decided to attach a lid with a hinge so that it would look better and it would be child proof
Day 4
Today sir Oro gave a comment on our design, he said that we should just make a utensil dryer instead of a knife and shot glass one so we just went with the flow. Kurt has also made our website and hopefully made a good one.
Day 5
Right now we just some finished of the other task while drawing the design of the utensil holder. We have already made up our mind on the design and it is what we are going to do
Day 6
Kurt said that he already gave our url to sir Oro so now we are done with that. I and david have already finished the production plan. Only the progress chart left to make.
Day 7
Kurt is gone for a week so only m and david are here right now. David and I have finished the progress chart today but w still cant cut th wood bcausth lab isn’t opnyt, so w ar just waiting hr.
Day 8
David and I actually did nothing today, just waiting for the lab to open.
Day 9
Today sir Oro checked our progress, Sir Oro again gave us more help on our product and gave us more ideas we can add to our end product.
Day 10
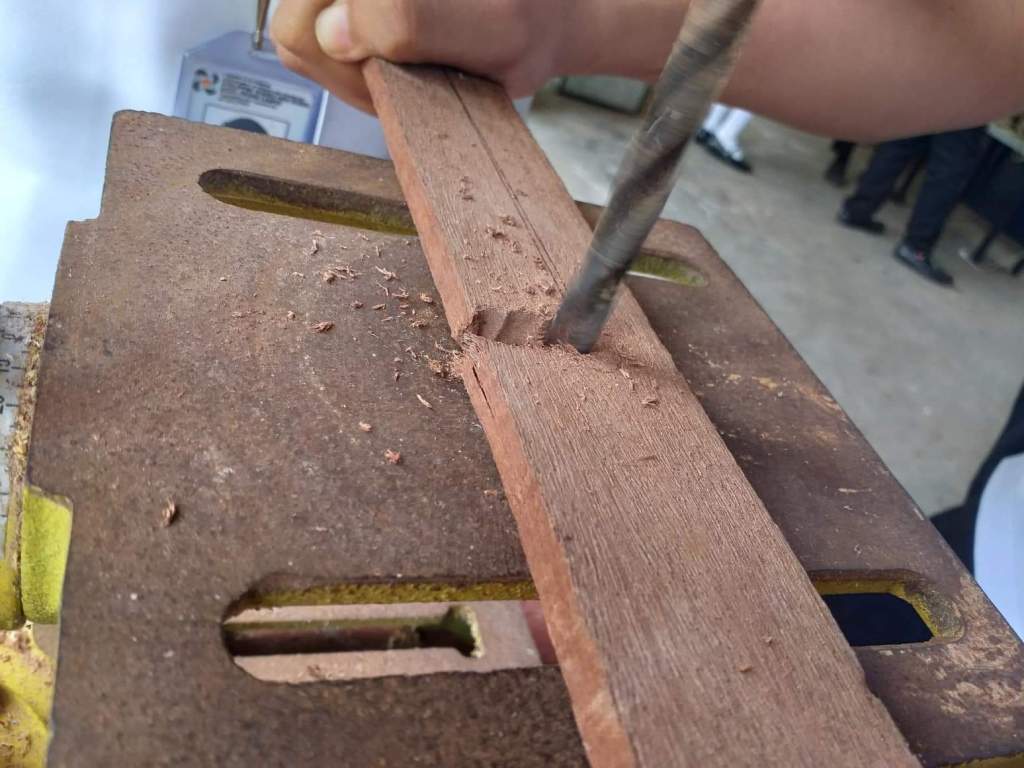
Cutting has started but we only had two pieces of wood so we had to work with it, we were actually mostly just introduced to tools today so we only had like 10 mins. To do what we had to do so today was not rally productive.
Day 11
Now we still only have to work with two pieces of wood so w started cutting. W cut the two pieces into base for our product it was really fun to finally cut some wood.
Day 12
Now we have four pieces of wood lying around. Today we just put in guides for cutting and cut some of the wood into smaller manageable and desirable pieces.
Day 13
Production is actually very slow right now and we only like manage to cut a few pieces per class. Today we cut the long strips of wood which will act as the place where w dry the materials.
Day 14
The four pieces of wood have already been processed now and are made into the correct sizes we want them to. We are waiting for the two pieces of wood that will arrive next week.
Day 15
The two extra pieces of wood are here and we are starting to process them immediately. We have already marked where we will cut them tomorrow so the it would be a lot easier.
Day 16
Today, we just cut the two pieces of wood that we marked yesterday though we never thought that planning about joints would be this time consuming.
Day 17
So this is our last meeting for the year because of the Christmas Break. We only need the joints now anyways and to modify the sizes of the other pieces of wood and also to smoothen them as well.
Day 18
First meeting of the year and we basically did nothing except for planning on what we should do and recapping what we’ve done the past year.
Day 19
Today we crammed a lot of cutting for the joints but we’re not finished quite yet. We also have conflicting schedules because the periodical tests are due tomorrow and we cant extend out Adtech class today because we have to read notes.
Day 20
We also just did cutting for the joints today but we still are not done with joint cutting so we will continue it tomorrow hopefully we will finish it.
Day 21
We had a lot of surprise modifications we really did not expect so we had to modify some of our cutting and we had to do it today, we have finished our joints today so that’s a first.
Day 22
This session we basically just smoothened our wood and used the filers and sandpaper to fit the joints together with relative ease.
Day 23
Today we started gluing our woods with wood glue but wood gluing actually takes more time than we had expected, we were only able to glue about 4 main components today. We are semi-confident that we can finish tomorrow.
Day 24
We tried to glue all the pieces today but accidentally snapped a part of one of our joints, now we had one more thing we had to glue, good thing sir Oro let us take home the project and finish it there, I’m pretty sure that there are only about 10 or less groups that presented the project today


Design Brief:
The task is to create a structure with only 6 pieces of wood, each measuring 62×4.5×1.5 centimeters. We are to create any structure that can be used for entertainment or for everyday life. We can also shape borrow from other structures for ideas.
Design Requirement:
Make a Structure that has its own usage for entertainment/day to day life and to create something using only wood and other materials in consideration.
| Constraints | Grade | Considerations | Grade |
| Use of only 6 pieces of wood measuring 62×4.5×1.5 cm. | 1 | Portability | 5 |
| Use of at least 3 joints. | 2 | If the artifact is plain/varnished/colored | 4 |
| Artifact should have a purpose of its own. | 4 | How small the artifact can be. | 3 |
| Size of the artifact. | 5 | How the artifact is used. | 1 |
| The design must be loosely based on the structure of other buildings. | 3 | Other materials used to maximize the effectiveness of the artifact. | 2 |
My Top Five Priorities
Constraints
1. Usage only of wood measuring 62*4.5*1.5 cm.
2. Usage of at least 3 joints.
3. The design must be loosely based on buildings.
4. Artifact should have a purpose on its own.
Considerations
1. How the Artifact is used
2. Other materials used
3. How small the artifact is
4. If the artifact is colored or varnished
5. Portability
6. Size of the artifact
Evaluation Criteria
Did the Artifact only use the six planks of wood given?
Was the Artifact useful at anything?
Is the Artifact durable and has a long lifespan?
Did the Artifact use at least three (3) joints?
| Part | No. | Material | Length | Width | Thickness |
| Slope A | 3 | Wood planks | 50 cm | 4.5 cm | 1.5 cm |
| Cup Dryer | 1 | Wood Planks | 40 cm | 4.5 cm. | 1.5 cm |
| Case support | 9 | Wood Planks | 10 cm. | 3 cm | 1.5 cm |
| Base Support | 1 | Wood Planks | 31 cm. | 4.5 cm | 1.5 cm |
| Base Support 2 | 1 | Wood Planks | 20 cm | 4.5 cm | 1.5 cm |
| Tools and Equipment |
| Power tools |
| saw |
| drill |
| sandpaper |
| blade |
| Wood glue |
| varnish |
Production Plan
| Step | Procedure/Materials | Tools/Equipment | Risk | Time |
| 1 | Cutting the pieces according to their respective size with their own incisions | jigsaw, power saw, chisel, power planer | cuts | 3 meetings |
| 2 | Creating the joints according to the piece | Power saw, jigsaw, power planer | cuts | 2 meetings |
| 3 | Attaching the pieces together | Wood glue | Unnecessary excess glue | 1 meeting |
| 4 | Varnishing and Finishing | Sandpaper and vanish | Cuts and eye contact | 1 meeting |
Progress Chart
| Step | Week One | Week Two | Week Three | Week Four | Week Five | Week Six | Week Seven | Week Eight |
| Planning | Doing | Doing | Doing | |||||
| Gathering of Materials | Doing | Doing | Doing | |||||
| Cutting | ||||||||
| Joint creation | ||||||||
| Attaching pieces | ||||||||
| reinforcing | ||||||||
| 7 | ||||||||
| 8 |
Production Logbook
Day 1
Today Sir Oro held a lesson about Shape Borrowing and gave us some ideas and insights on what we should make with our 6 wooden planks.
Day 2
Today we just started on planning for our product. David and Kurt Brainstormed designs while Juan made the design brief and design requirements. We settled on a knife and shot glass holder. We are planning on finishing it early. We also started on our constraints and considerations.
Today was pretty easy. We also finished a little bit earlier than the other groups.
Day 3
Today we finished our design requirements up to the evaluation criteria and made improvements on the design. We decided to attach a lid with a hinge so that it would look better and it would be child proof
Day 4
Today sir Oro gave a comment on our design, he said that we should just make a utensil dryer instead of a knife and shot glass one so we just went with the flow. Kurt has also made our website and hopefully made a good one.
Day 5
Right now we just some finished of the other task while drawing the design of the utensil holder. We have already made up our mind on the design and it is what we are going to do
Make sure to follow us
This is an example post, originally published as part of Blogging University. Enroll in one of our ten programs, and start your blog right.
You’re going to publish a post today. Don’t worry about how your blog looks. Don’t worry if you haven’t given it a name yet, or you’re feeling overwhelmed. Just click the “New Post” button, and tell us why you’re here.
Why do this?
The post can be short or long, a personal intro to your life or a bloggy mission statement, a manifesto for the future or a simple outline of your the types of things you hope to publish.
To help you get started, here are a few questions:
You’re not locked into any of this; one of the wonderful things about blogs is how they constantly evolve as we learn, grow, and interact with one another — but it’s good to know where and why you started, and articulating your goals may just give you a few other post ideas.
Can’t think how to get started? Just write the first thing that pops into your head. Anne Lamott, author of a book on writing we love, says that you need to give yourself permission to write a “crappy first draft”. Anne makes a great point — just start writing, and worry about editing it later.
When you’re ready to publish, give your post three to five tags that describe your blog’s focus — writing, photography, fiction, parenting, food, cars, movies, sports, whatever. These tags will help others who care about your topics find you in the Reader. Make sure one of the tags is “zerotohero,” so other new bloggers can find you, too.
